Clipping in the Drop: How to Fix Distortion and Crackle in AI Music
The verse is clean. The drop crackles. Find out whether the overload happens in your chain or arrived inside the export.
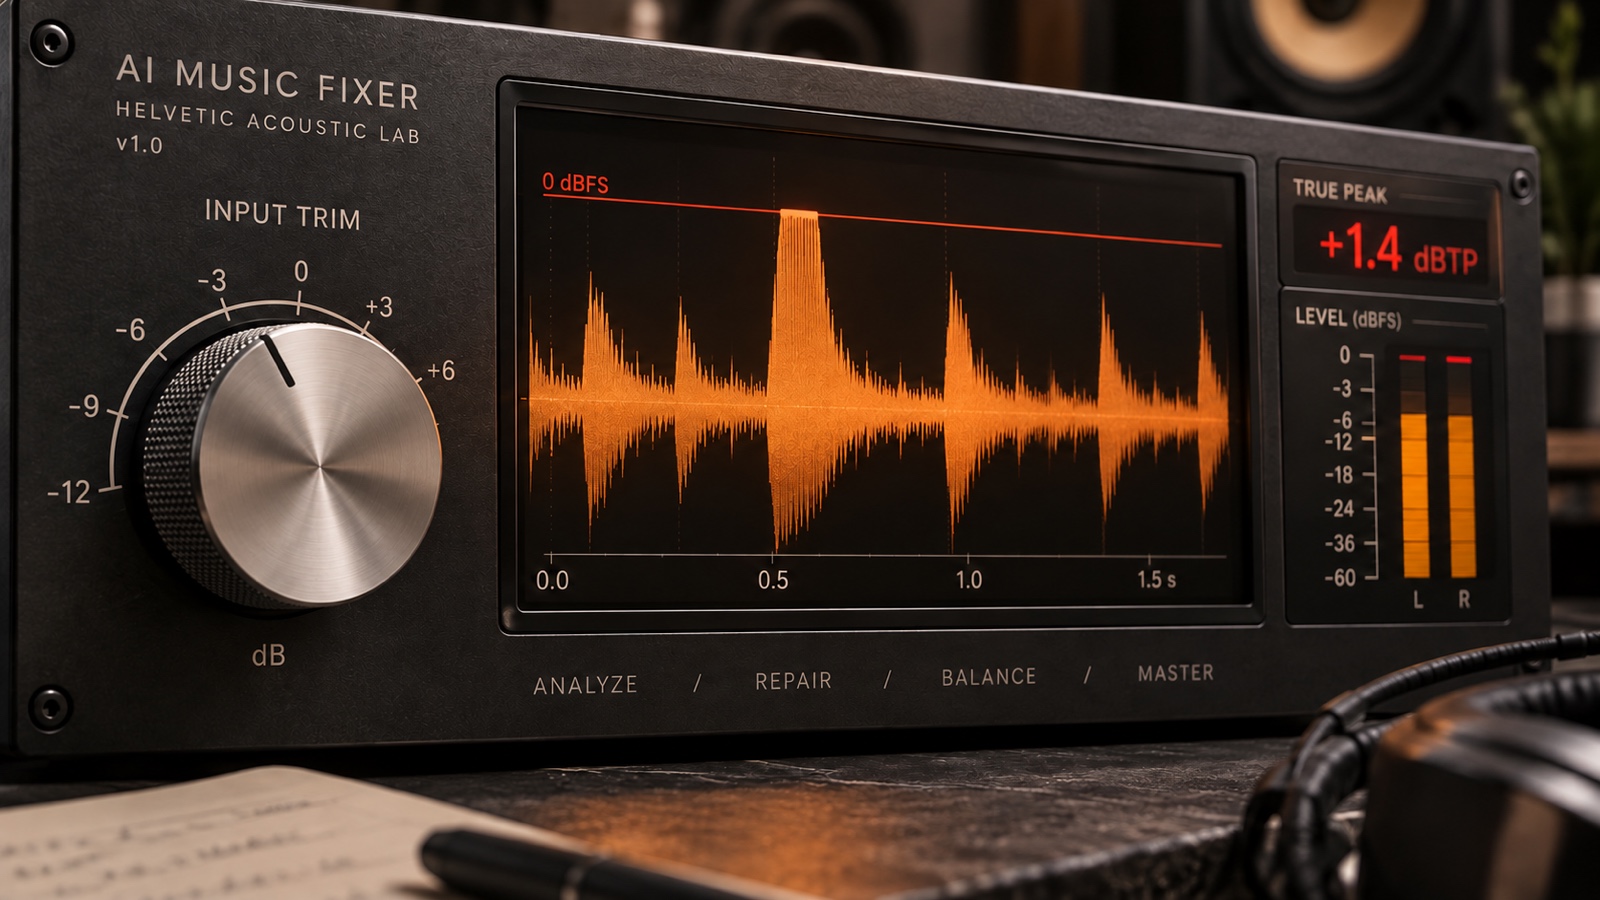
A Suno, Udio, or Mureka file can sound fine until the kick, bass, and vocal arrive together. Putting a limiter on the master may make that moment louder without repairing it. Keep an untouched export and loop four bars around the first damaged hit, with a little clean audio on either side.
If you are still choosing between hiss, harshness, masking, and distortion, start with the 30-second audio triage guide. Here the question is narrower: can a local peak repair help, or does the drop need a different source?
01 / Locate the damage
Three Kinds of Distortion That Can Ruin an AI Drop
Playback or plugin overload: test before repairing the file
Bypass the inserts and master-bus processing. Lower the audio clip's gain by 3 dB before the first plugin slot, then reintroduce processors one at a time while watching their input and output meters. Turning down the master fader after a distorted plugin is too late to protect that plugin's input.
If the crackle disappears, the test points toward level-dependent behavior later in the path. It does not prove inter-sample clipping: saturation, limiting, or a stressed speaker can also change when you lower level. Keep monitoring comfortable, and compare another playback device before declaring the source clean.
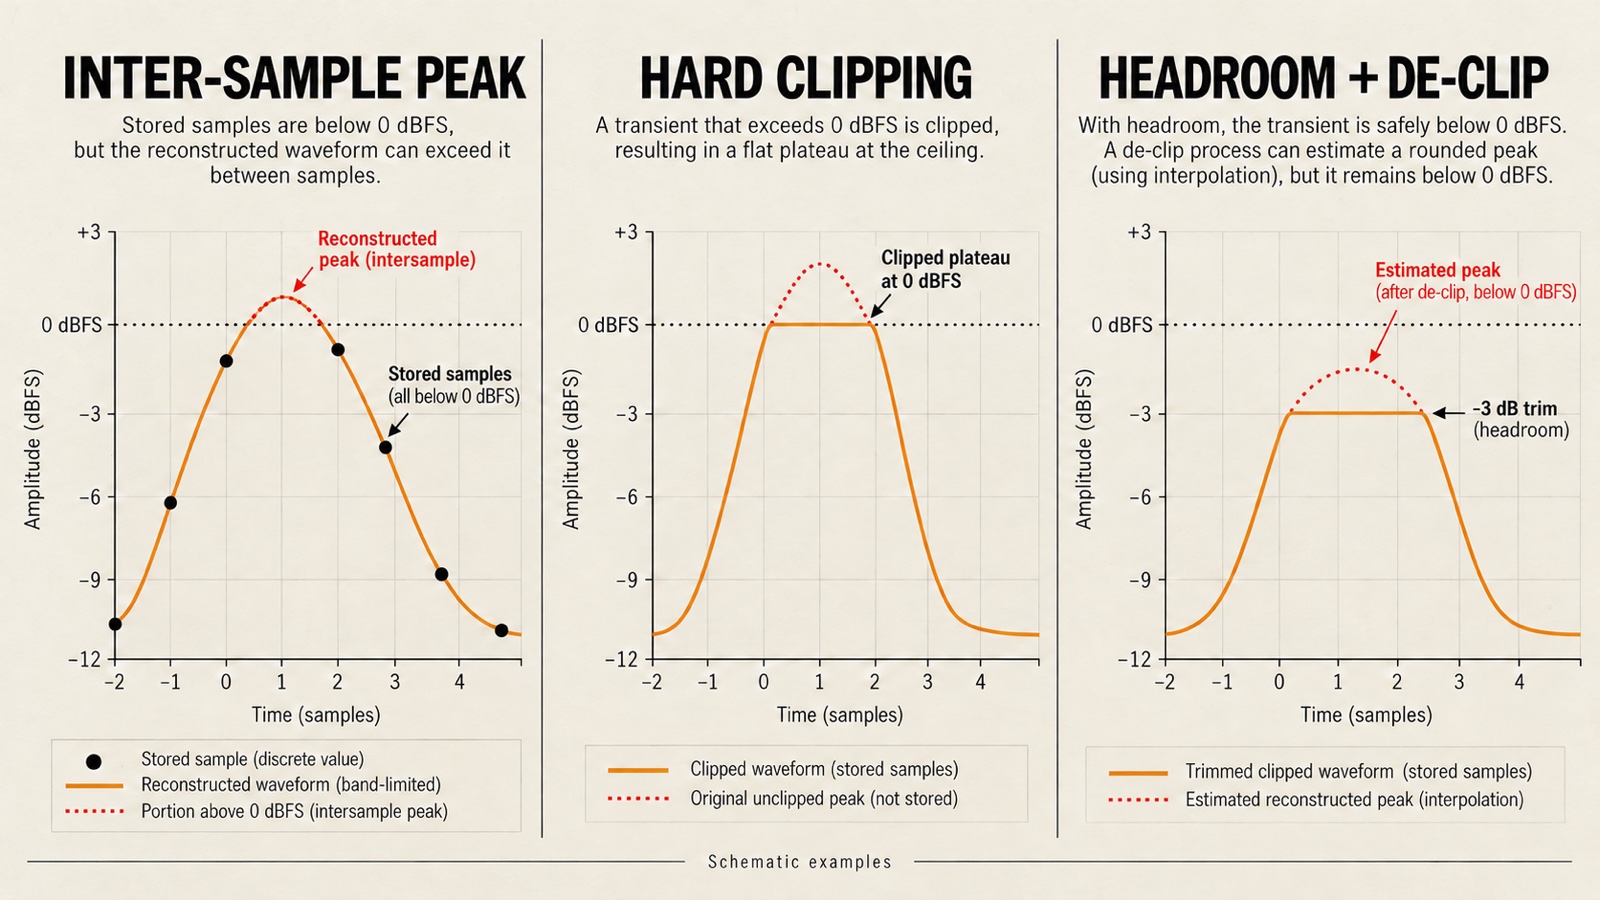
True peak estimates the reconstructed waveform between stored samples; sample peak reads the samples themselves. A file below 0 dBFS on a sample meter can still have a higher true peak. Use an ITU-R BS.1770 true-peak meter before and after processing. A 3 dB reduction is a diagnostic starting point, not a guarantee of enough headroom for every chain.
Hard clipping: look for flattened transient peaks
Zoom into a kick or snare hit until individual samples are visible. Several peaks stopping at a repeated, flat horizontal shelf support a clipping diagnosis. That shelf can sit below 0 dBFS if someone turned the file down after clipping. A dense waveform viewed from far away is not enough evidence.
A de-clipper estimates a smoother peak from the surrounding waveform. iZotope's De-clip documentation describes threshold-based interpolation. That is a repair attempt, not retrieval of the exact original signal; a naturally square synth wave can also look flat, so confirm the unwanted crackle by listening.
Distortion printed into the source: listen beyond the peaks
A vocal that buzzes whenever the bass hits may contain embedded distortion, or your processing may be making those elements interact. Intermodulation means new frequency components produced when signals pass through a nonlinear stage. Hearing that texture alone cannot identify the generator's internal process.
If lowering gain and bypassing the chain leave the same torn vowels and chords, treat the damage as part of this export. Rounded peaks do not prove the absence of earlier clipping, and de-clipping is not a general cure for an unstable vocal. Use a stem or replacement take when a local preview cannot improve the passage without weakening it.
02 / Choose one test
The Drop Distortion Diagnostic Matrix
Use the same four-bar loop for each check. Write down where the crackle happens before changing anything. The repair column gives you a first trial, not a preset for the whole song.
| Audible & visual sign | What the waveform or meter shows | Best repair move | Stop / re-roll condition |
|---|---|---|---|
| Crackle eases after -3 dB input trim | Check input/output peaks and true peak; the waveform itself simply gets smaller | Keep sufficient headroom and locate the stage adding distortion; meter again | Crackle stays in the bypassed export on a second playback path: investigate source damage |
| Short crackle on kick or snare hits | Repeated flat tops at a consistent level when zoomed into samples | Preview selective de-clipping just below the clipped shelf | Rebuilt hits sound dull, smeared, or no cleaner: undo and compare another source |
| Vocal tears when sub-bass hits | Dense low end may coincide with gain reduction; the display alone cannot locate the cause | Bypass the chain, audition a small dynamic low-shelf cut, or repair a usable bass stem | The voice remains torn in the unprocessed source: compare a replacement passage |
| Fizzy or piercing top end without clear clipped peaks | Listen for a concentrated upper-frequency buildup rather than assuming clipping | Try the chorus harsh-highs dynamic EQ guide | Lyrics or harmony break apart across the section: stop spectral cleanup |
Save the baseline and its playback level. If a final true-peak limiter is needed later, a ceiling near -1 dBTP is a conservative trial consistent with this site's mastering workflow; check the actual delivery specification and encoded result. The limiter cannot undo damage already in the file.
03 / Repair a copy
Step-by-Step Repair Workflow for Recoverable Clipping
Step 1: Create Headroom Before De-Clipping
Duplicate the file, select the damaged drop, and leave the clean original available for comparison. Start with 3–4 dB of attenuation before processing, or use the restoration tool's output gain as its manual directs. Reconstructed peaks can rise above the old plateau, so measure the result rather than assuming that fixed reduction is sufficient.
The RX 11 manual's De-clip section explains the output headroom requirement. A 32-bit float file can store values above full scale in a compatible workflow, but playback can still overload. Lower the output before auditioning or exporting to a fixed-point format.
Step 2: Set the De-Clipper Threshold Just Below the Flat Tops
Select only the damaged passage and inspect the histogram, which counts how much audio sits at each level. Put the threshold just below the concentrated clipping shelf, using the waveform view to confirm which peaks the tool will touch. If you lowered input gain, find the shelf at its new level; do not keep using the old 0 dBFS threshold.
Preview a small adjustment, then undo or compare it. There is no universal 0.2 dB offset or guaranteed number of decibels a de-clipper can recover. Keep the setting only when the crackle recedes while the kick's punch and snare attack survive. Check the clean audio at both ends of the selection for a level jump or edit click.
Step 3: Relieve Low-End Pressure Before Mastering
If the repaired drop still makes the next processor pump, bypass that processor and inspect the bass. As a starting point, audition about 2 dB of dynamic low-shelf reduction below roughly 80 Hz, active on the loudest hits. Move the band to suit the actual bass note and undo the cut if it removes weight without solving the overload.
EQ can reduce what drives later overload; it cannot remove distortion already imprinted on the vocal. When you have a usable isolated part, follow stems-or-stereo repair rather than thinning the entire mix. Once the source passes, use the 5-point pre-mastering source gate.
Step 4: Verify with Level-Matched and Difference Listening
Match the original and repaired loop in perceived loudness before judging them. Restored peaks can rise without a matching increase in average loudness, so peak normalization is not a fair match. Follow the blind level-matched comparison protocol and listen for cleaner hits, intact lyrics, and the same groove. Louder still has an excellent sales pitch.
If your editor supports it, align the two copies in time, compensate for processing latency and gain, then subtract one from the other by polarity inversion. The difference signal includes every change, including estimated new peak material; it is not a container of pure unwanted noise. Clear drum or vocal content there is a reason to inspect the trade-off, while the matched A/B remains the decision test.
Finally, measure output true peak, audition the whole chorus, and check the section boundaries at normal monitoring level. Keep the untouched source and save the repaired version under a new filename.
04 / Protect the song
When to Stop Repairing and Regenerate the Drop
Set a three-minute diagnostic budget for one passage. If input attenuation, a bypassed chain, and one selective de-clip preview leave the same broken vocal or sustained chord, stop stacking processors. The timer is a workflow limit, not a measurement of how damaged the file is.
For a quick listening check, temporarily high-pass a copy near 150 Hz. If the midrange still tears, lowering the bass alone will not restore it. This test does not prove a neural cause: filtering changes the signal and may hide some symptoms. Undo the filter afterward and compare a new take when the musical performance remains damaged.
In Suno, Replace Section is documented for Pro and Premier subscribers. Select the damaged passage, compare the offered versions, and audition the resulting whole song, including both joins. A new section may change the performance. Use the sequential Suno export repair plan to keep the replacement and later processing in order. For another generator or an existing downloaded file, use only editing features actually available in your account, or compare a fresh generation.
05 / FAQ
Frequently Asked Questions
Can a limiter or compressor fix clipping in an AI song?
An ordinary limiter or compressor controls level; it does not estimate the missing tops of already clipped peaks. A dedicated de-clipper attempts that reconstruction. Keep a limiter for later peak control, and compare the repaired drop before adding more compression.
Why does my AI track sound clipped when the file peaks at -0.1 dBFS?
A sample-peak meter only measures stored samples. The reconstructed waveform can peak higher between those samples, and later processing or decoding can change peak levels. Use a true-peak meter and bypass your processing chain. A low meter reading also cannot rule out distortion already printed into the file.
Should I run a de-clipper across the entire song?
Start with a copy of the damaged drop or chorus. Process the rest only if you find the same clipping there and a matched-level comparison supports the change. Keep clean verses untouched, and check the joins so the repaired section does not jump in level or lose drum attack.
Keep the useful take
Repair the peak. Recheck the song.
One clean preview is worth more than a long chain of hopeful fixes. Save the version that reduces the crackle while keeping the drop's impact.
Return to the diagnostic matrix ↑